


If you saw my instagram posts about my Christmas felt wreath or chocolate chip granola, you may have noticed that my kitchen table is white now!!!

But it wasn’t always that way…
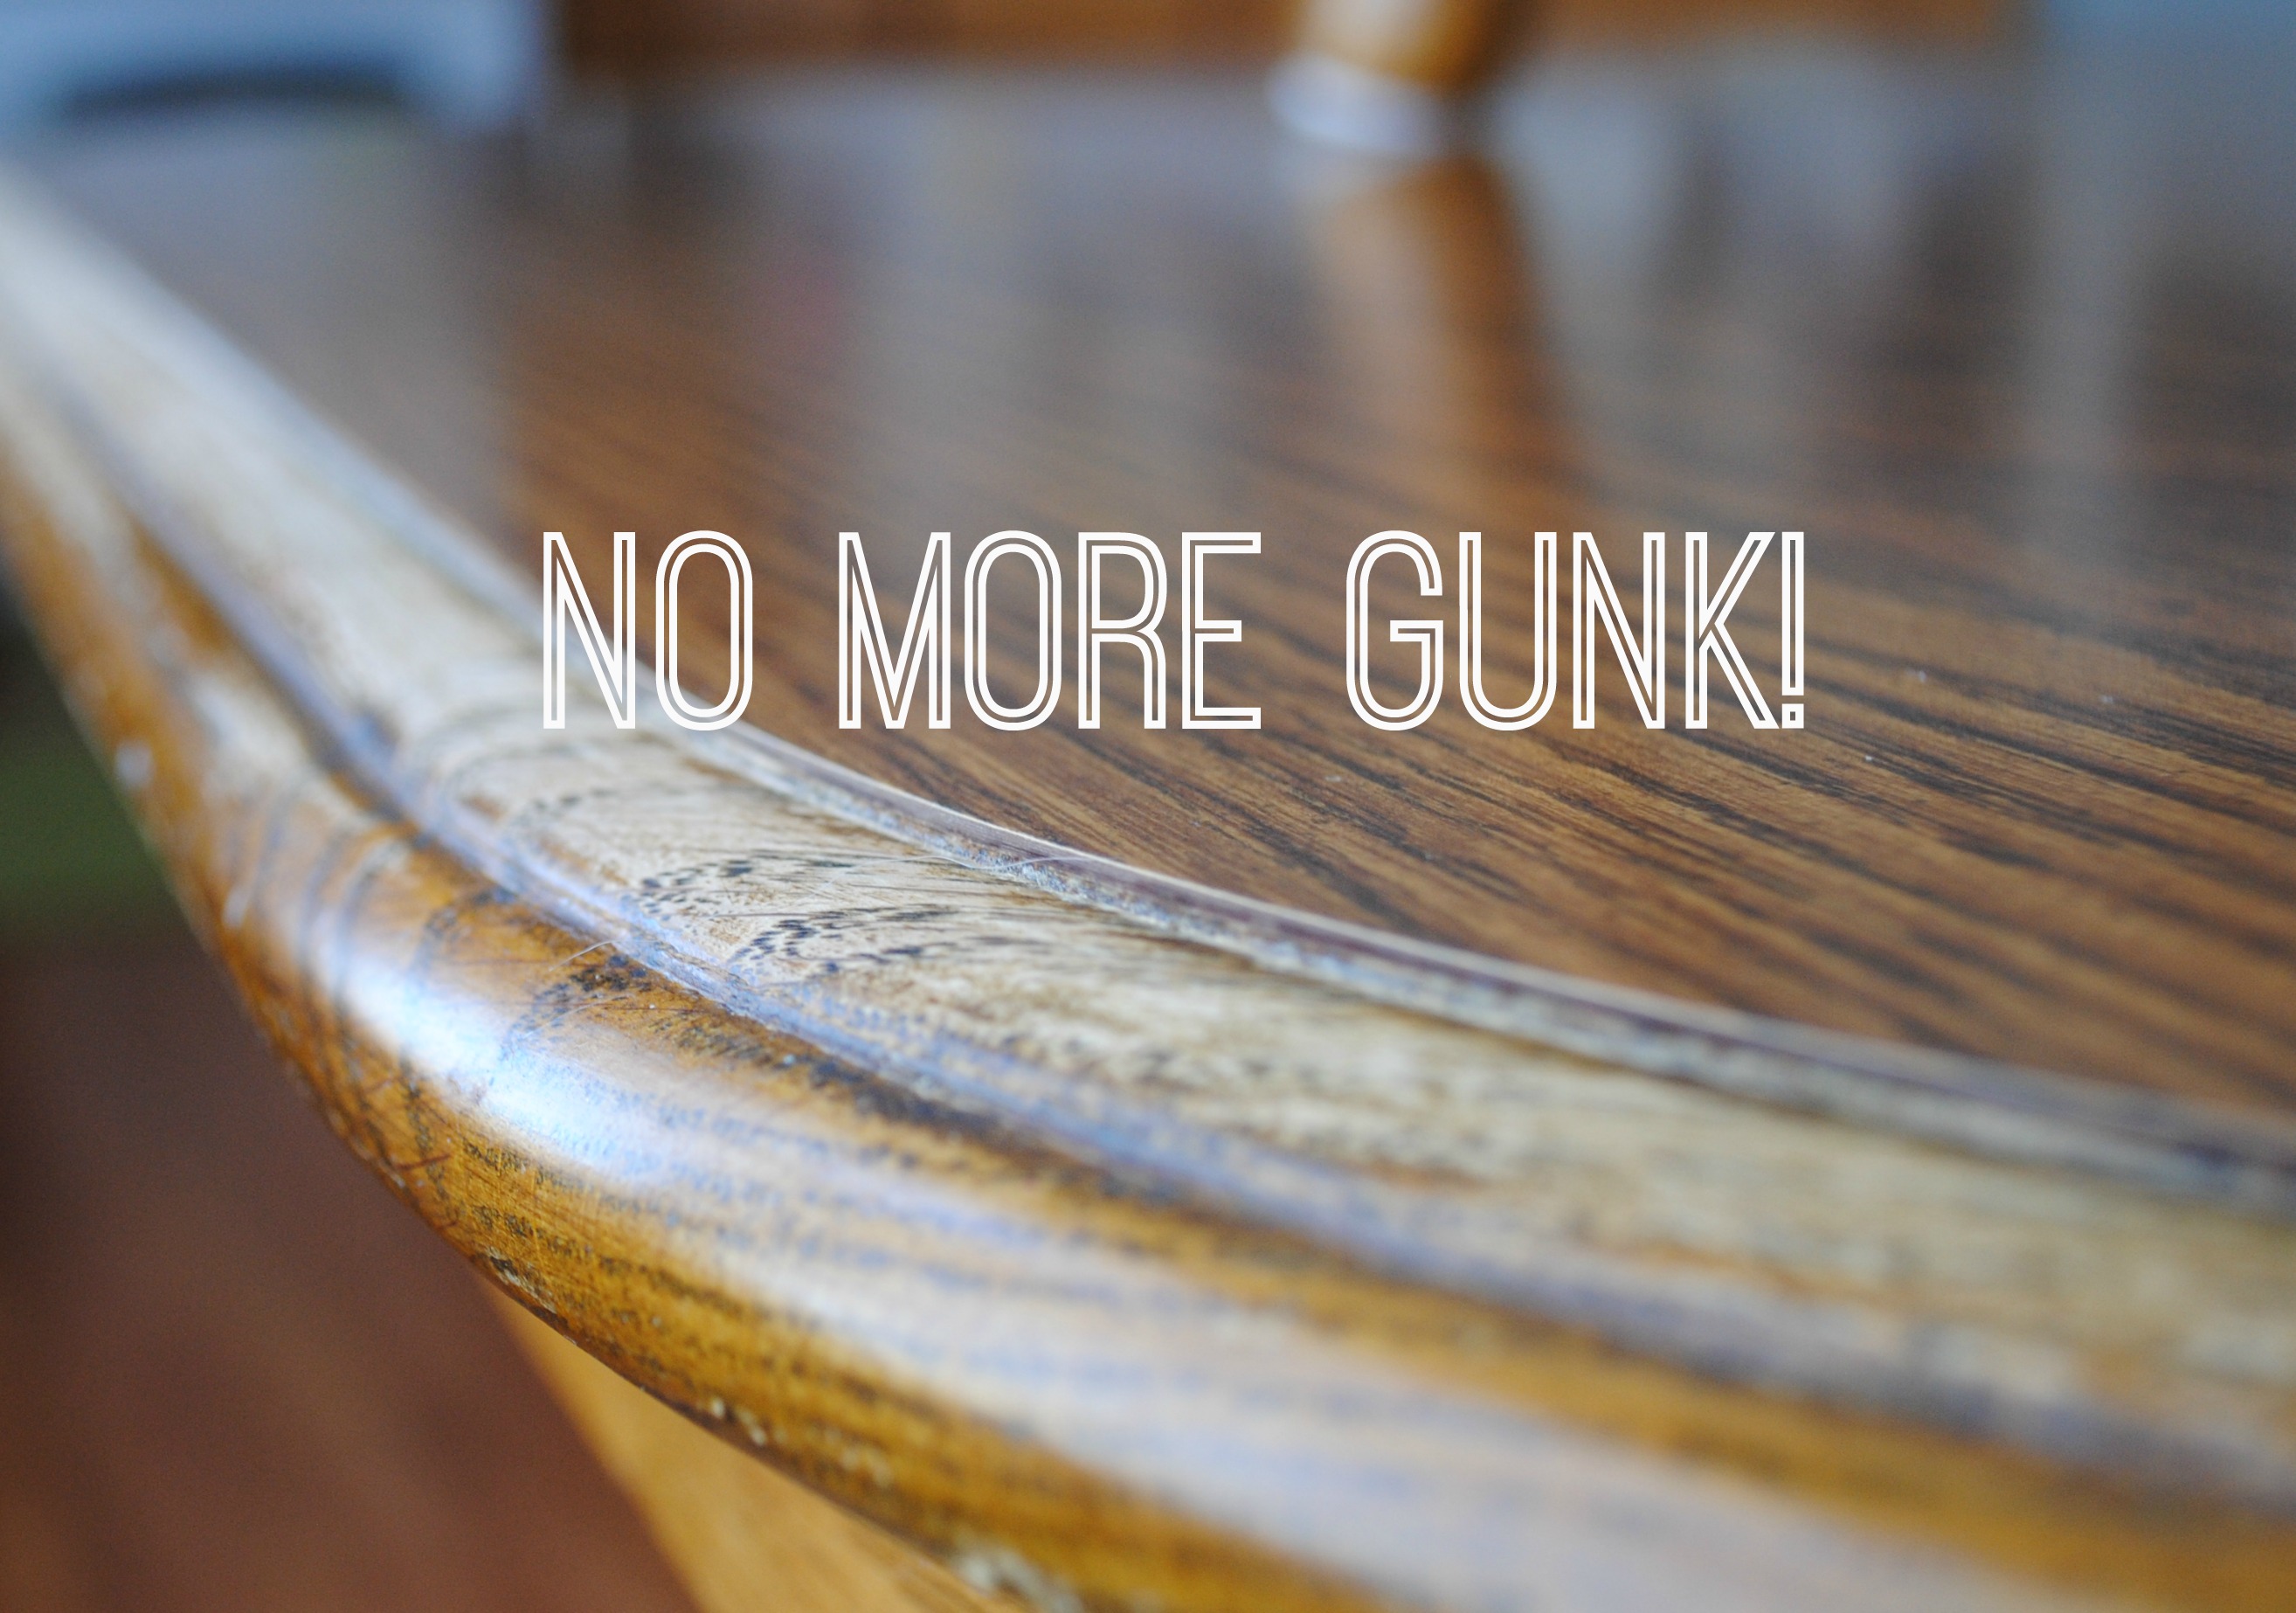
Welcome to Gunksville, USA. Population: my kitchen table.
You know how sometimes you think you clean really well, until you realize maybe you don’t?

This table is pretty well loved. It used to be John’s kitchen table growing up, I’m not sure how long they had it there, but my guess is a while! So, understandably, it had some buildup around the edges where grubby kids hands ate all of their meals. Alex has definitely added to that gunk over the past year that he has been eating at the table. The kid can make a mess. And don’t think Christian isn’t partly to blame here.
Before I got to painting the table and chairs, I thought I should probably degrease/clean the table. Now, I wouldn’t recommend my cleaning technique if you aren’t planning on refinishing your table. I definitely took off a lot of finish with all of my scrubbing and scraping. I may have gone overboard.
I started off with some dawn dish soap and just a splash of water and a toothbrush. My dawn claims overnight soaking power in 5 minutes, so I worked in a few different sections, scrubbing on the soap and letting it sit for 5 minutes. I then went back with a razor blade and scraped all of the gunk out. This is just from one corner!

As you can see, a lot of the finish came off with the gunk. It’s definitely time for a paint job!
Would you believe it if I told you I didn’t even take a before picture of the table? Well, believe it, because this is as good as it gets right here. #bloggerfail

And don’t forget the upside down before of the chair. And my helper. #keepinitreal

I decided to use chalk paint on the table and chairs because there are a ton of little crevices and spindles that I really didn’t feel like sanding and since it boasts that it will bond to anything, I was on board! Since I’m totally cheap thrifty, I researched a bunch of home made chalk paint recipes and was feeling confident that this would work just as well as the $40/quart stuff. Especially since my bedside table has held up so well.
For the chairs, I started by wiping them down with a 50/50 mixture of white vinegar and water and let them dry. I grabbed up a quart of flat paint from Ace (the same color as our soffit in the kitchen) and got to mixing my chalk paint.
My chalk paint recipe:
2 tbsp Plaster of Paris
3 tbsp cool water
1 cup flat paint
Note: Always wear a mask when working with Plaster of Paris while mixing or sanding!! Toxic stuff people.
Mix up the water and Plaster of Paris until it is completely dissolved, then add your cup of paint. I usually approximate this part because I never feel like dirtying a measuring cup to measure out a cup of paint. Plus John says I’m not allowed to use anything our food touches for my painting projects anymore. I really can’t see his point.
This is the best part, so hold on to your hats. You just get to start painting! No sanding, scuffing, deglossing, priming. NONE of that nonsense. It’s pretty brilliant.
The chairs each got two coats of paint which took approximately 400 hours over a few weeks. But, it was totally worth it!!! My heart loves painting transformations. It felt a little wrong to distress the chairs, but it always wins me over when it’s done. I love stuff that looks old.

I know you’re waiting for it, so here is the catch about the wonderful chalk paint. You have to give it a protective finish. After a lot of searching about this topic, I chose SCJohnson Paste Finishing Wax. It was pretty easy to work with, but the buffing is a serious workout. Like, no joke, I was sweating after one coat on one chair. And the stuff is super stinky. It had me rethinking my decision. But, I really liked how it looked, so I stuck with it.
For the waxing part, I brushed on a light coat all over the chair and waited about 15 minutes for it to dry or soak in (whatever it was doing) then I buffed it with a soft cloth. You’ll know when its done needing to be buffed because you will feel the resistance leave and it will be smooth. I put one coat on the whole chair, then two coats on the seat and back of the chair (where your back will rest).
I do really like how the wax looks. It’s a little shiny, but not overly so and it goes well with the distressed look. But, while I was waxing, I thought my arm was going to fall off. I’m not telling you this to deter you from waxing your furniture, but I want you to go in with eyes wide open because I did not. You’ve been warned.
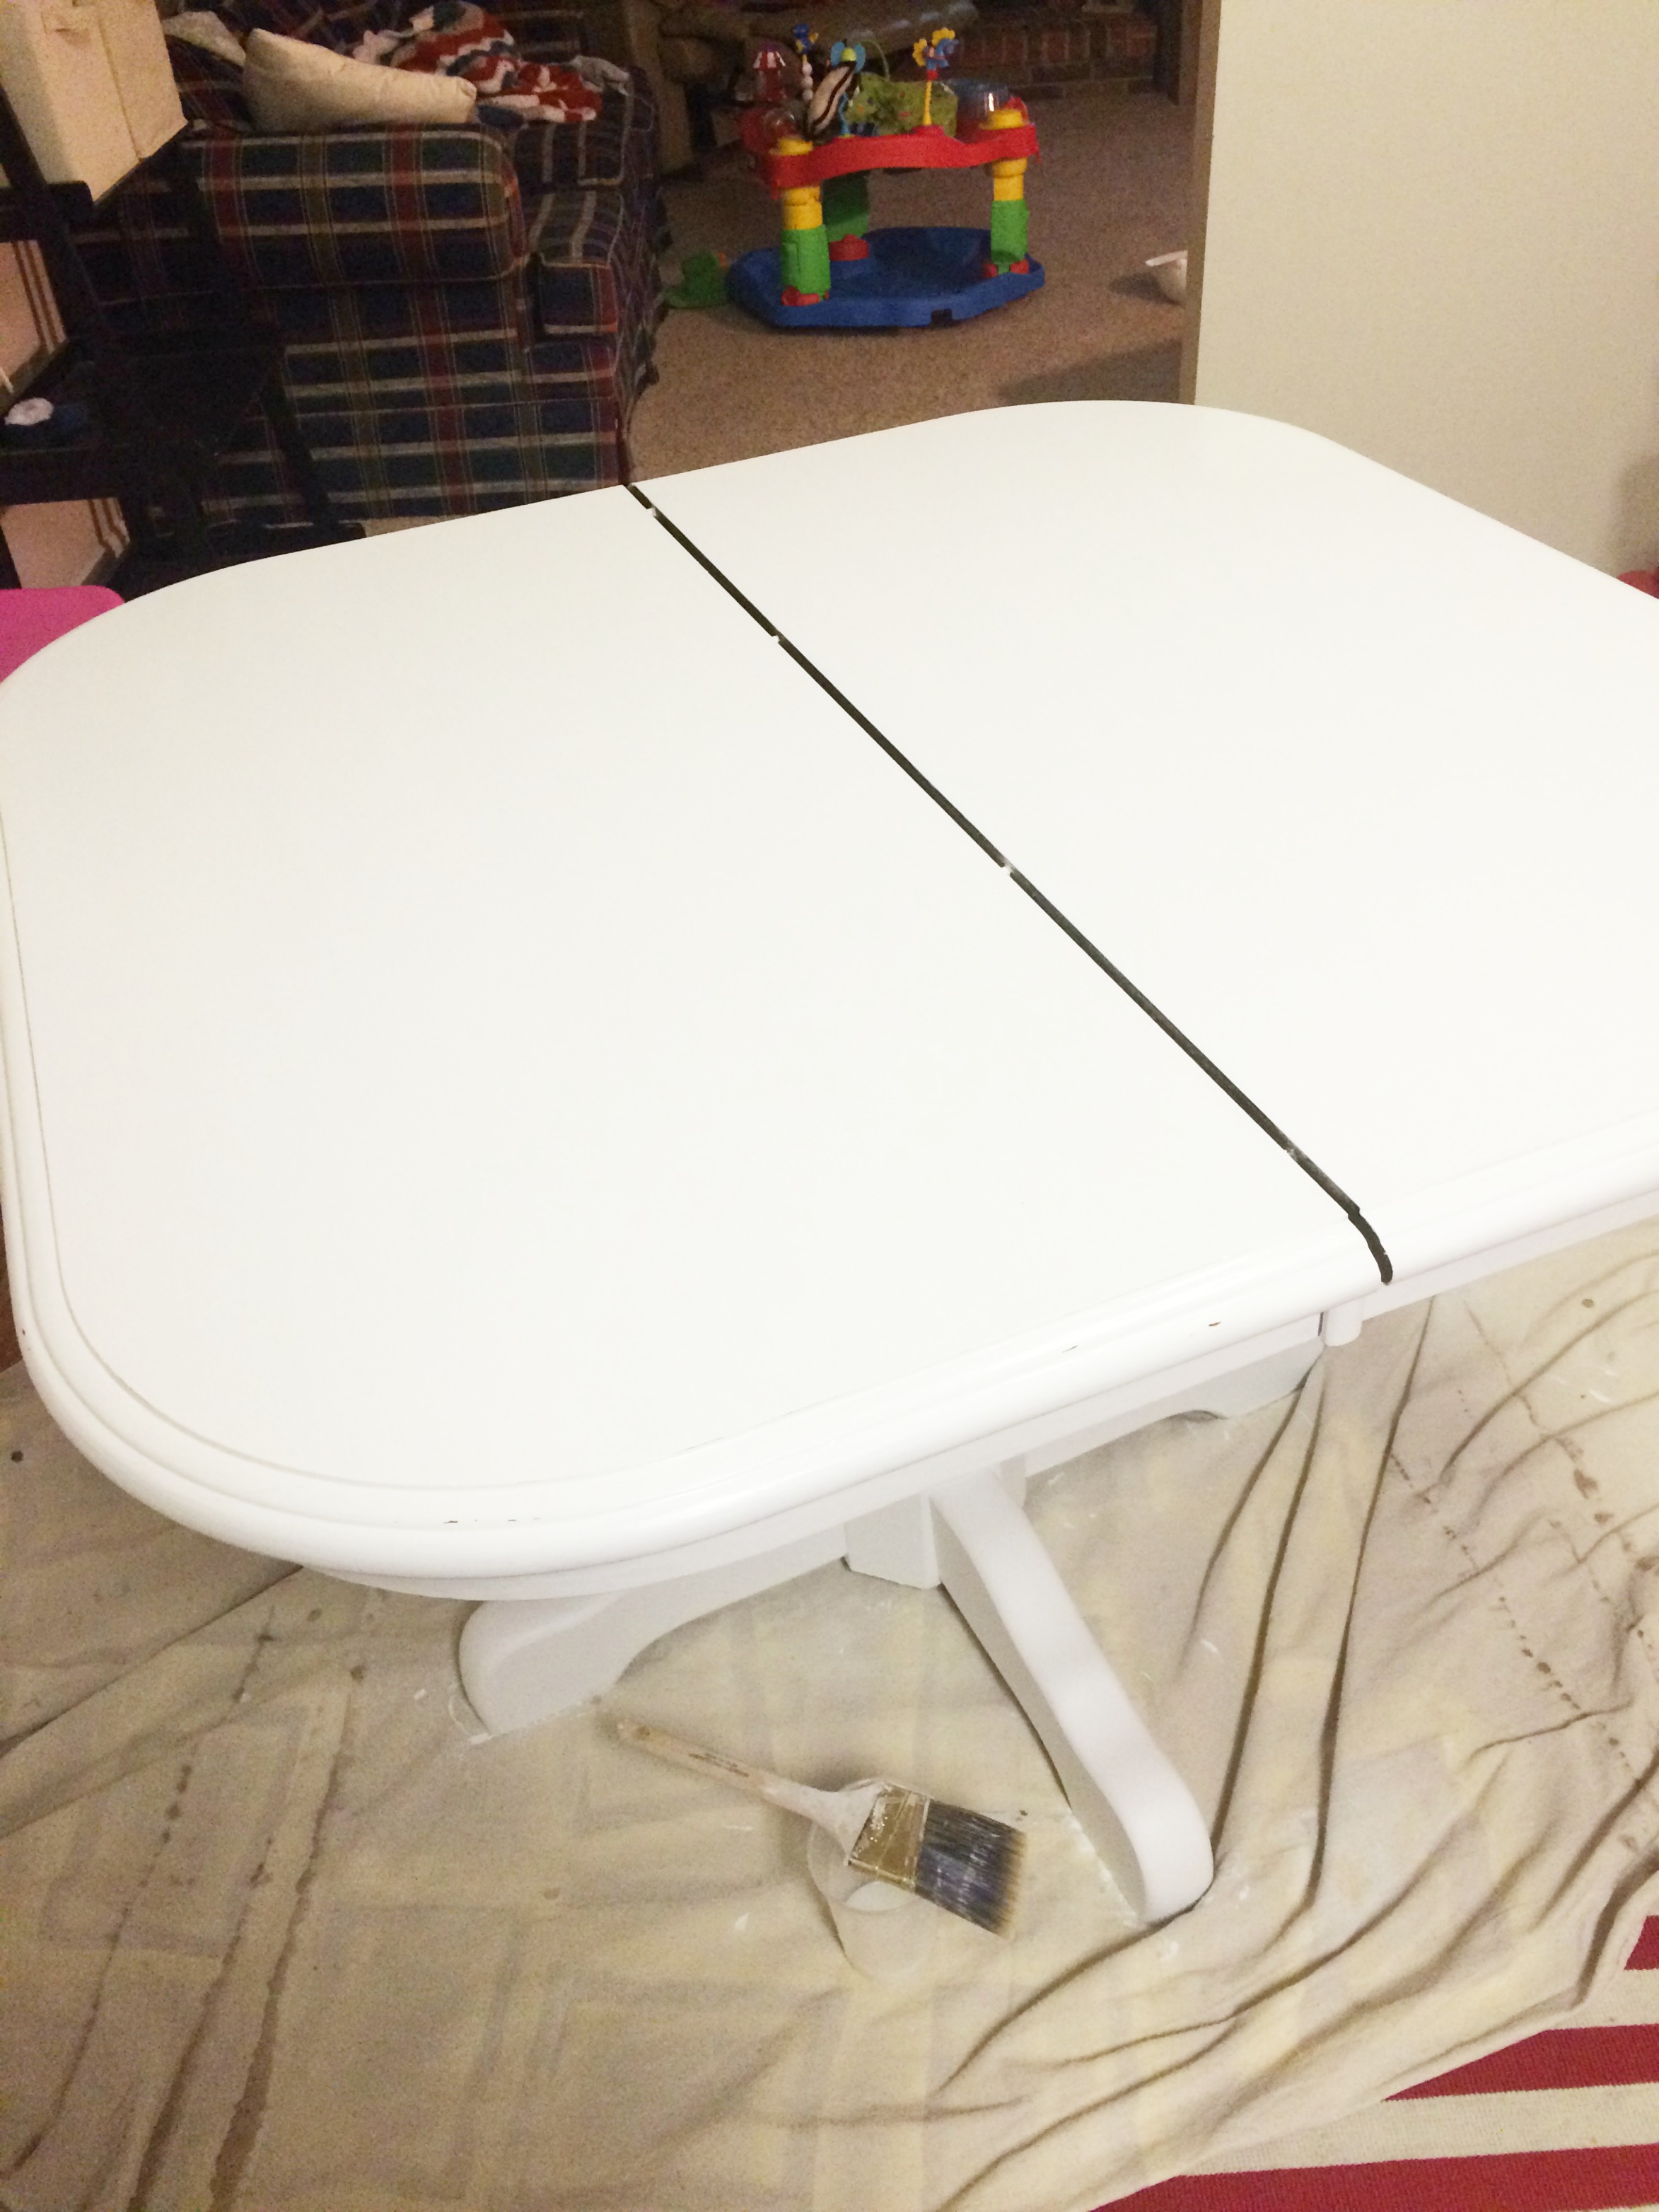
The table was feeling left out, so I mixed up some white chalk paint (using Kilz Premium Primer – it’s what we had!) and gave the table 4 (read em – FOUR) coats of paint. This is when John started laughing at me for using chalk paint. He made sure I knew I could’ve been done already if I had used the latex paint route. Got it, thanks, dear.
I got lazy cold feet about using the wax when it came to the table. Number one: the thought of buffing the table top had me near to tears and Number two: I was a little worried about its durability even though I’ve read everywhere that it holds up awesome, Alex is pretty rough on our table top! So, I ran out to Wal-mart last minute for some Poly-acrylic (which is what I used on my bedside table update). I have more experience with it and I felt more comfortable using it on something we use so often.
Two coats of that later and it was left to dry overnight. It probably wasn’t cured yet (does anybody know how long that actually takes??) but we started using it the next day! A few days without your kitchen table really wreaks havoc on life. We had a lot of picnics in the living room.
But, now it’s done! I’m so excited I could dance! Wait, I already did that.

I hope this inspires you to paint that piece of furniture that so isn’t your style and to make it yours and fall in love with it.

This post has been in progress for a while now because I wanted to test out the table for a bit first! I’m happy to say that Alex has put this thing to the test! PB & J, chocolate, pasta sauce, cars, trains, you name it! It has survived it all =]


Thanks so much for stopping by!
xo
Sam


