


First off, don’t hate me for taking a two month summer hibernation break. I’m totally sorry, but do you know how fast two months goes?? It’s crazy pants. Anyways. Thanks for sticking with me y’all, you’re the best!!
Today I’m bringing you a project that I have been thinking about for a while and finally got around to making (only took 6, maybe more, months)! A pallet clock! I’ve seen a few on Pinterest and Etsy and knew I could make it myself. And by myself, I mean with my dad and John’s help =]

First, John so lovingly brought me a pallet home from work. You know you’re a DIY nerd when your husband says he has a surprise for you in his trunk, and it’s a pallet! Husband of the year! My dad and I (mostly my dad) dismantled it over the summer and the wood has since sat there waiting to be utilized. One weekend a while back when my parents were visiting, I enlisted my dad’s mad MacGyver woodwork skills to help me assemble the clock.
What you’ll need:
Pallet wood (or furring strips if you don’t have pallet access)
Chop Saw
Jig Saw
Square
Wood glue
Measuring tape
Power sander
60 or 80 grit sandpaper
Craft paint and brush
Clock movement
Something to hang the clock with
First, we started off by chopping the pallet strips in half. We used 6 half strips. I knew I wanted the clock to be about 20″ in diameter, so we cut and laid the wood out accordingly.
Next, we needed to glue all of the pieces together. We laid them out on the work table (with plastic underneath) and put glue between each piece. Our first idea was to clamp two 1 x 10s on either side and drive two wedges to push the wood together (I didn’t have clamps long enough to span all of the wood).
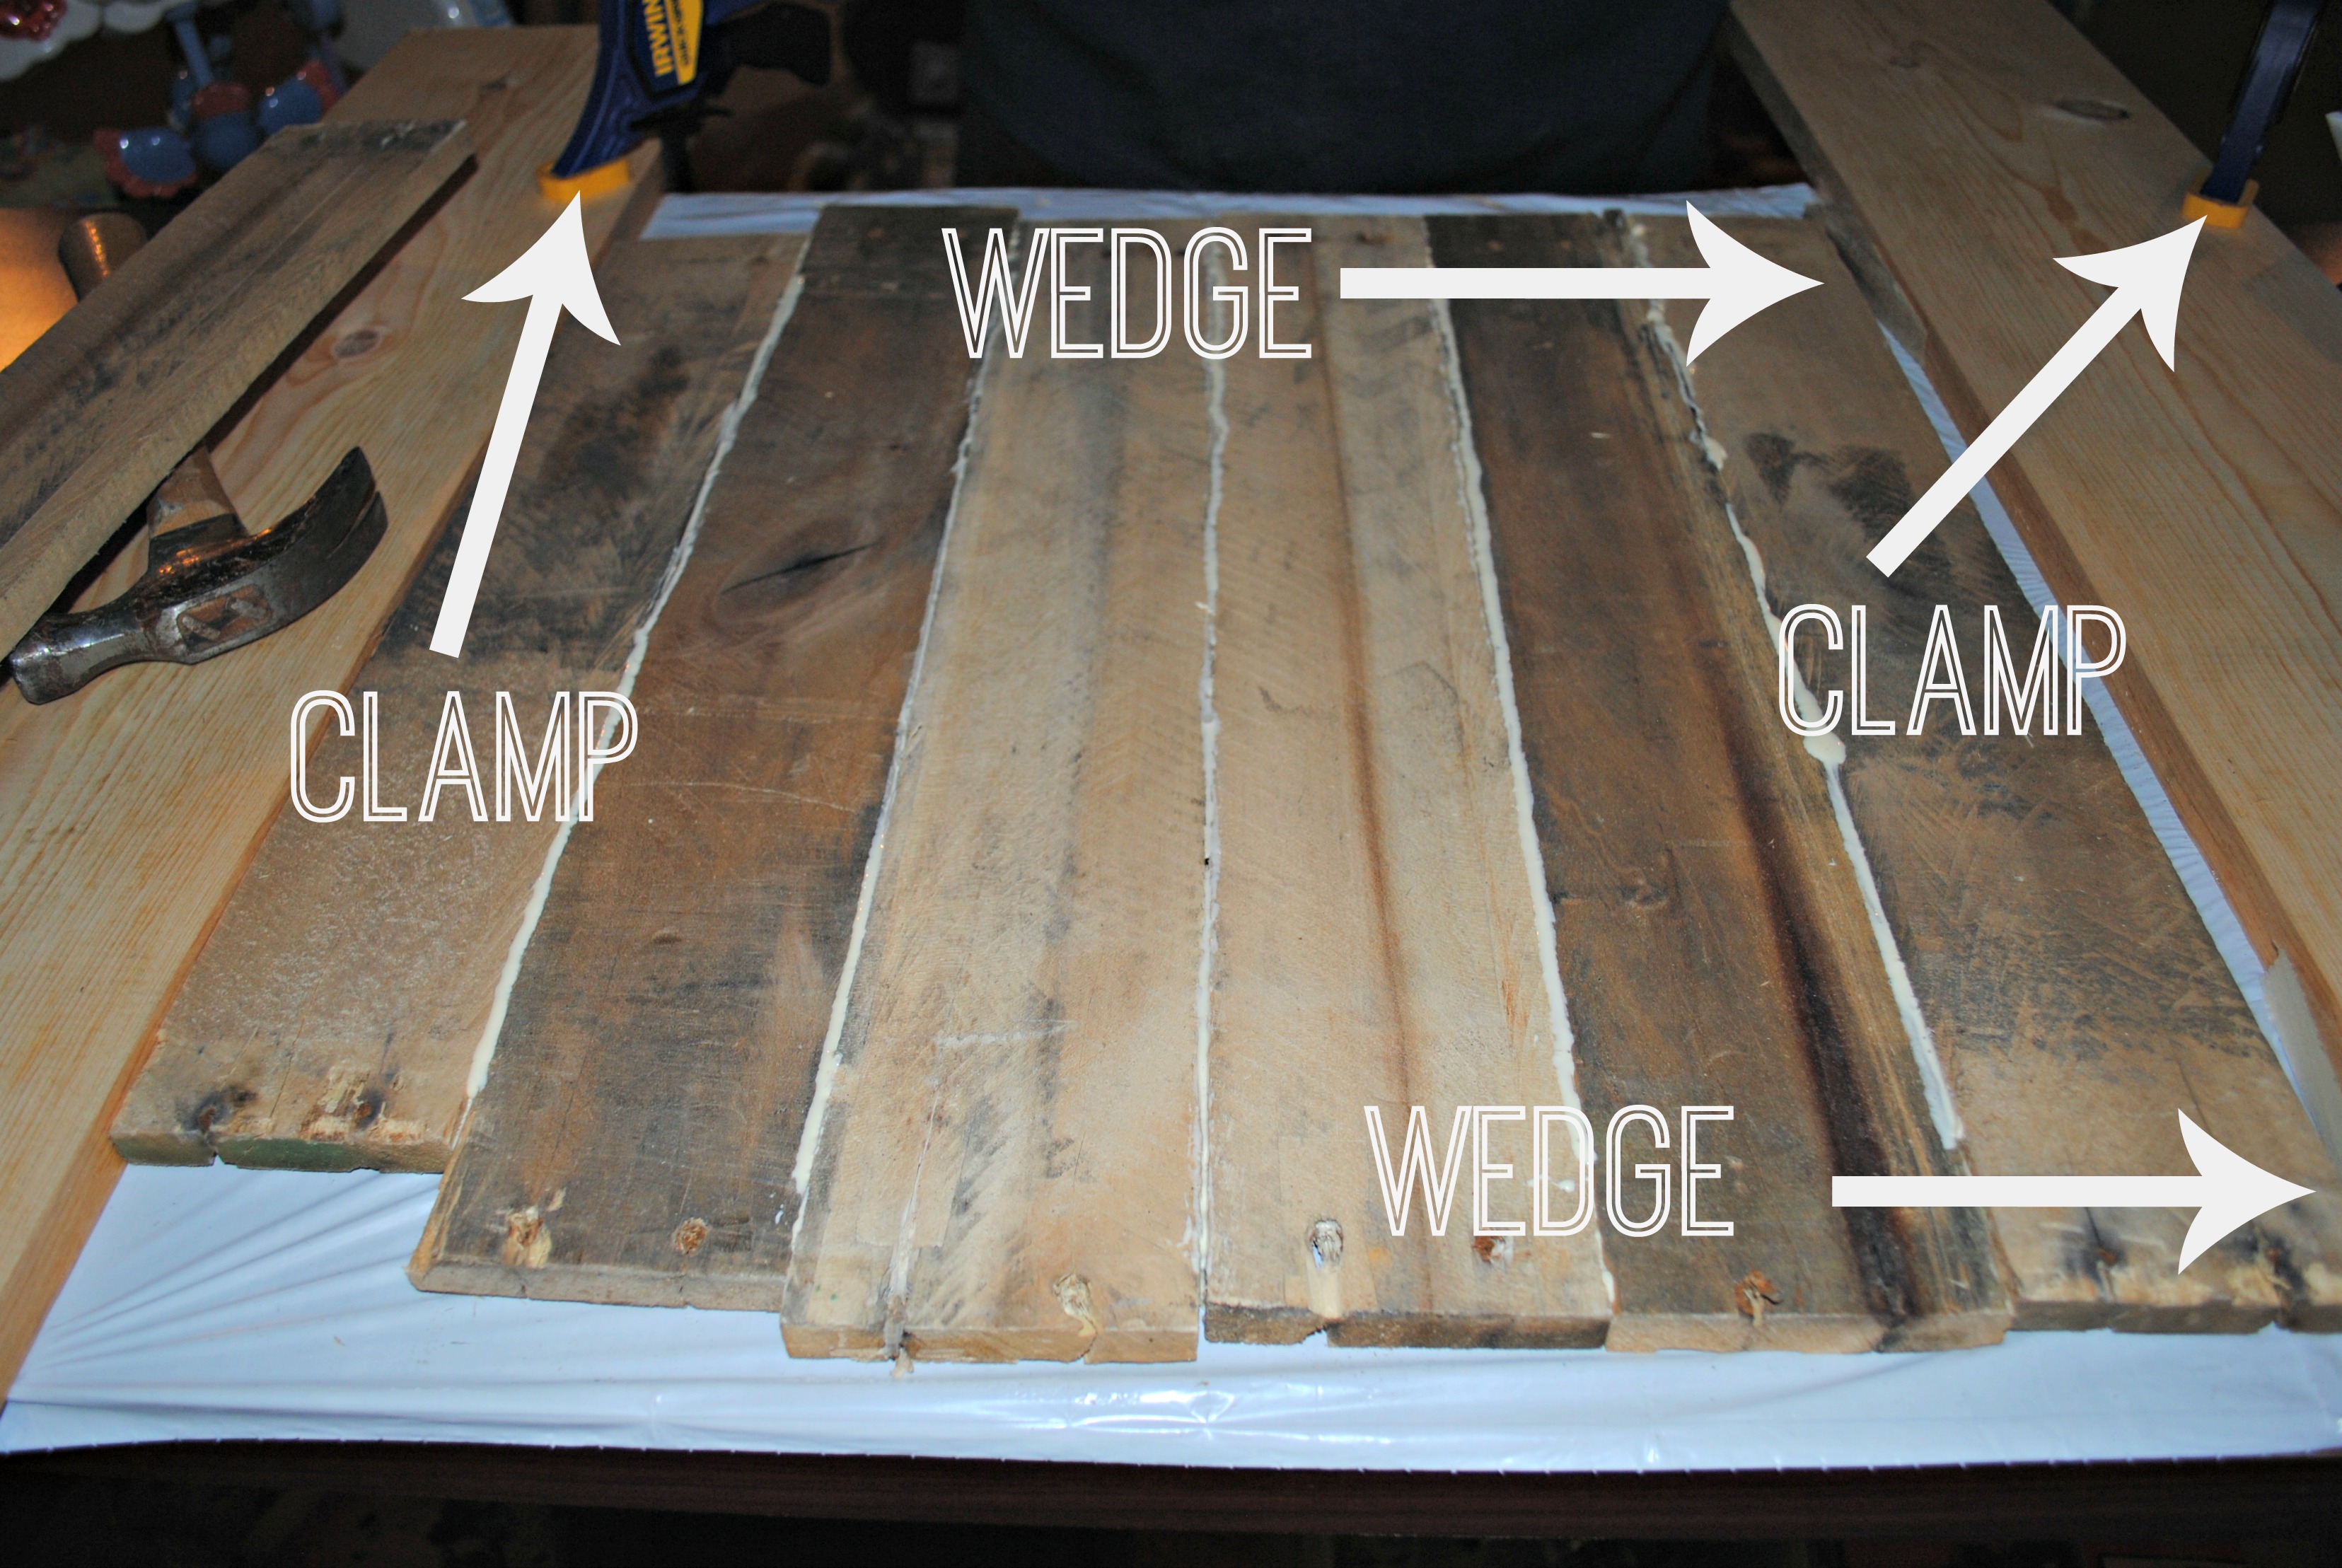
Turns out there wasn’t enough pressure on the wood to join it all together. As my dad explained, you want the wood glue to sort of ooze out of your joints so you know it’s all smooshed together nicely.
So, we then tried ratchet strapping the two 1 x 10s together. I’d say it was enough pressure to ooze the glue. Just a little too much pressure this time! The wood buckled and popped up. Bummer.
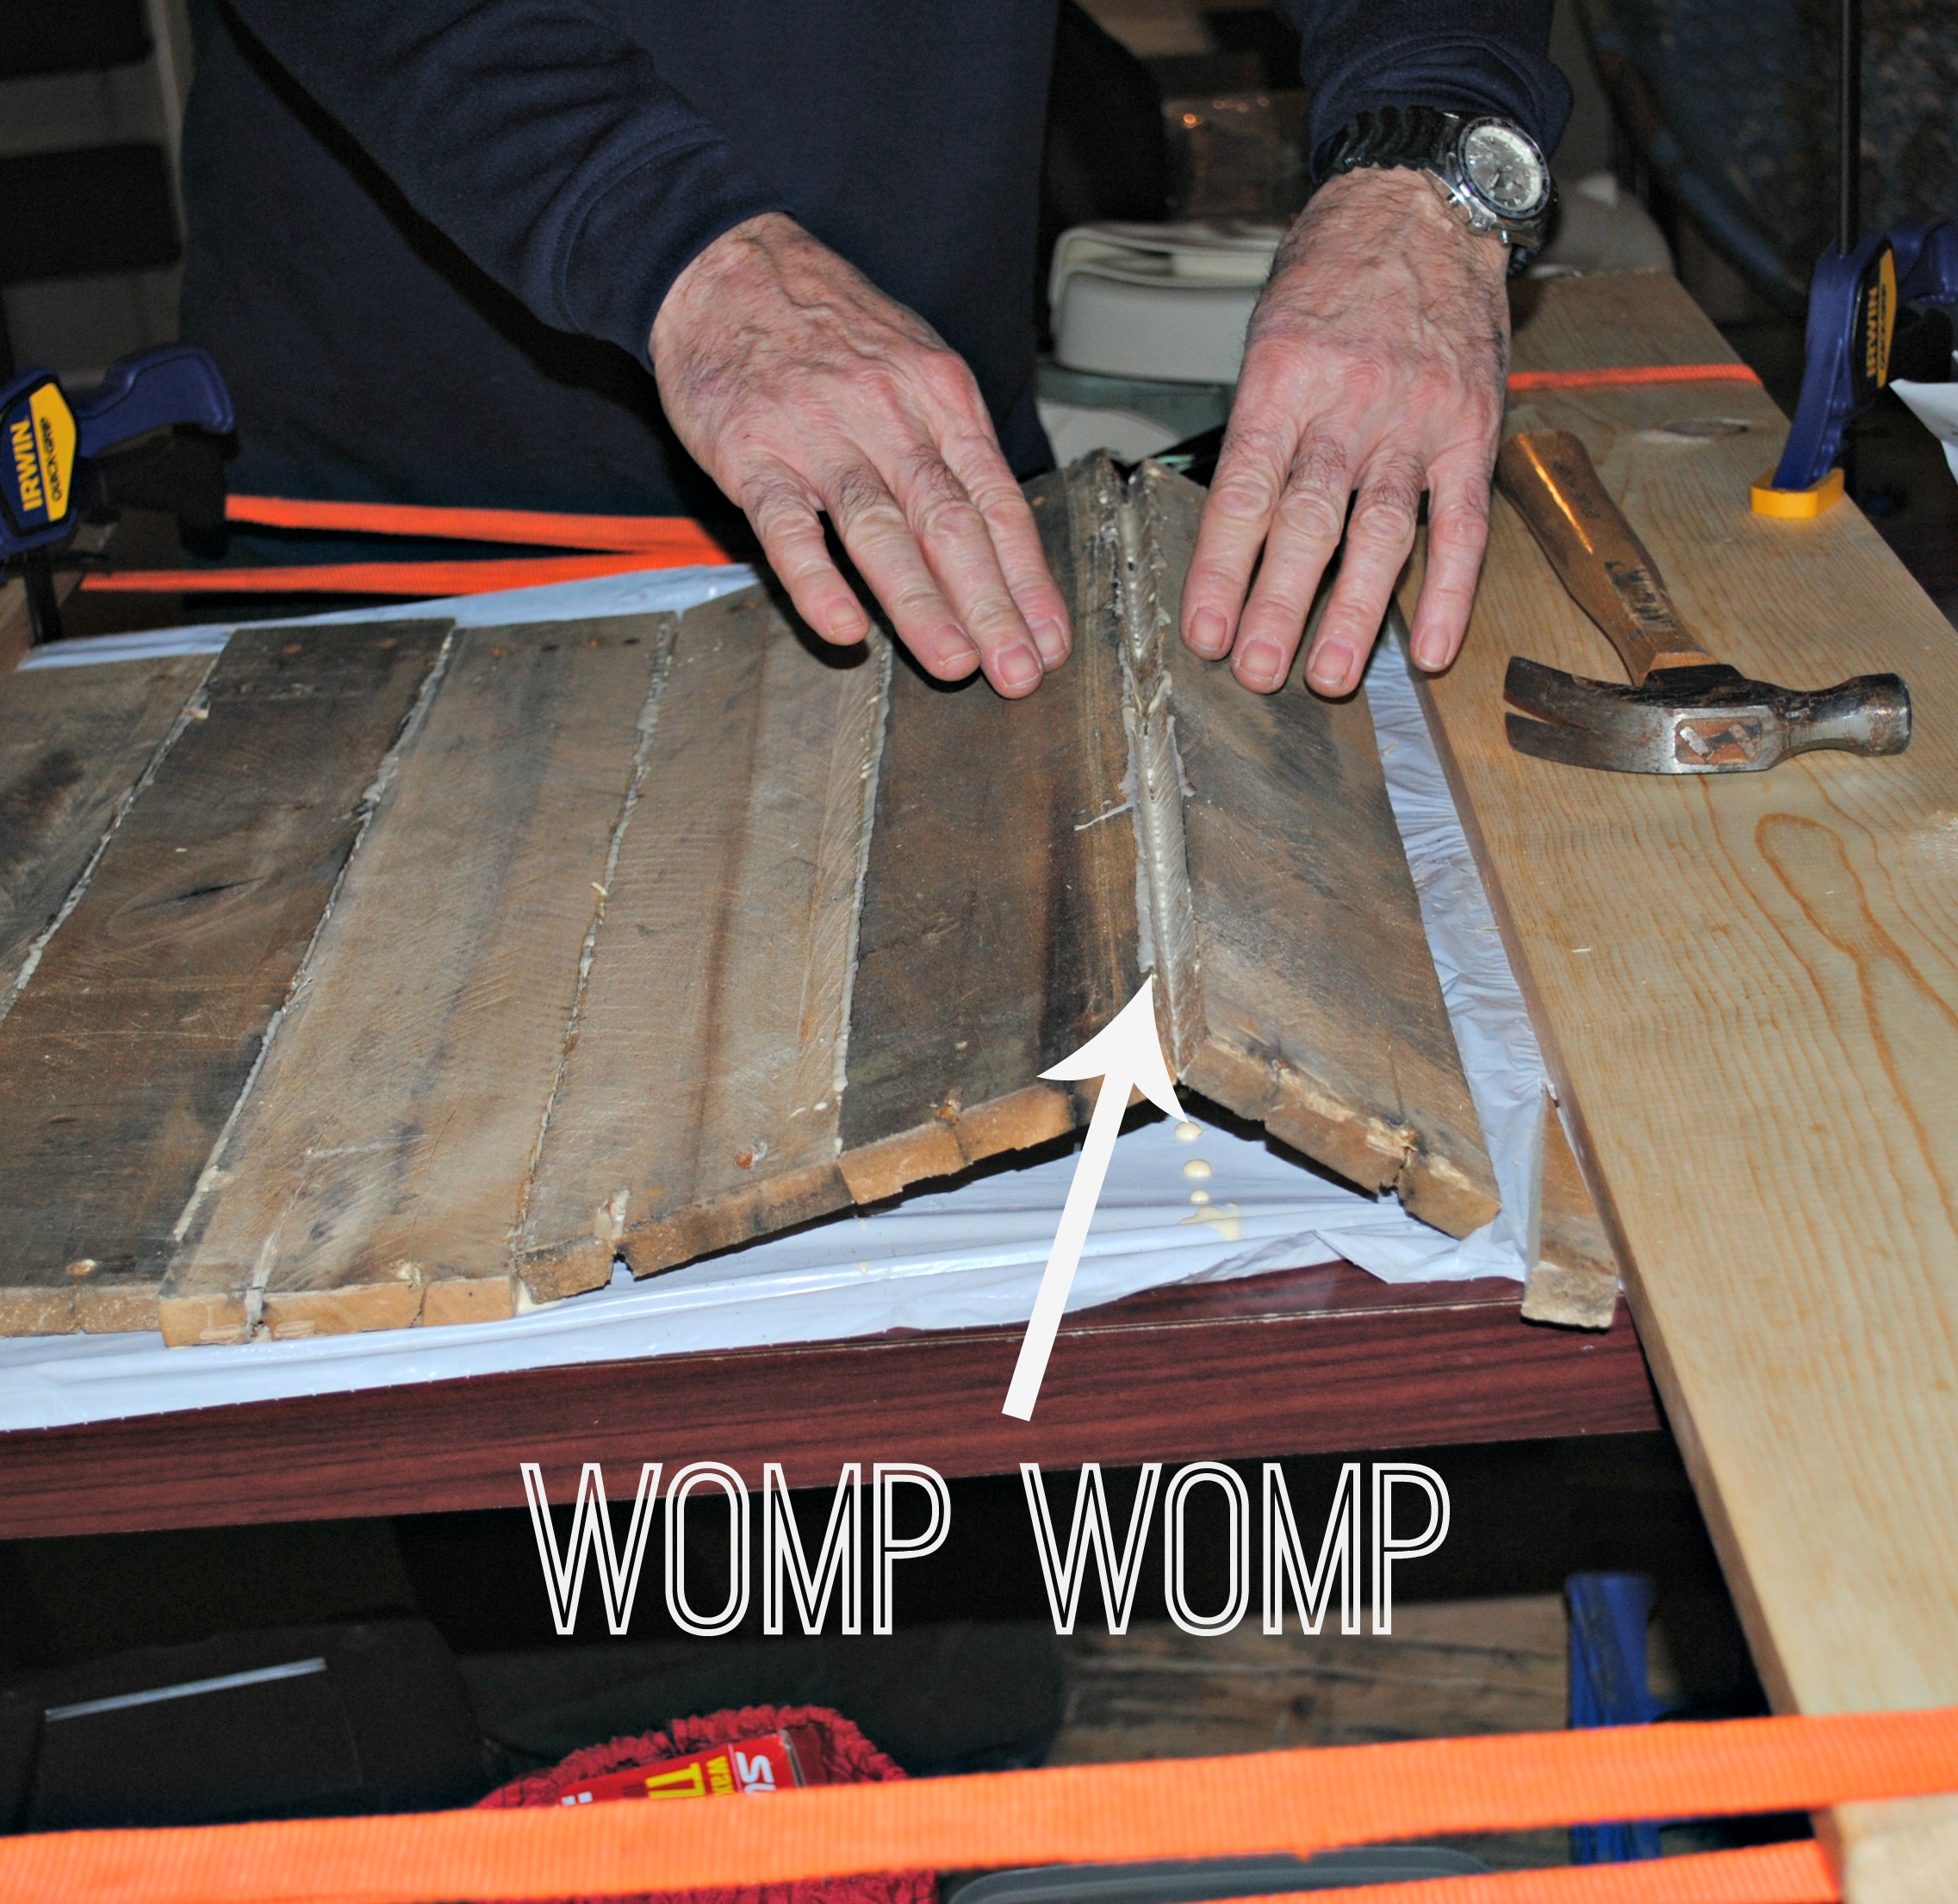
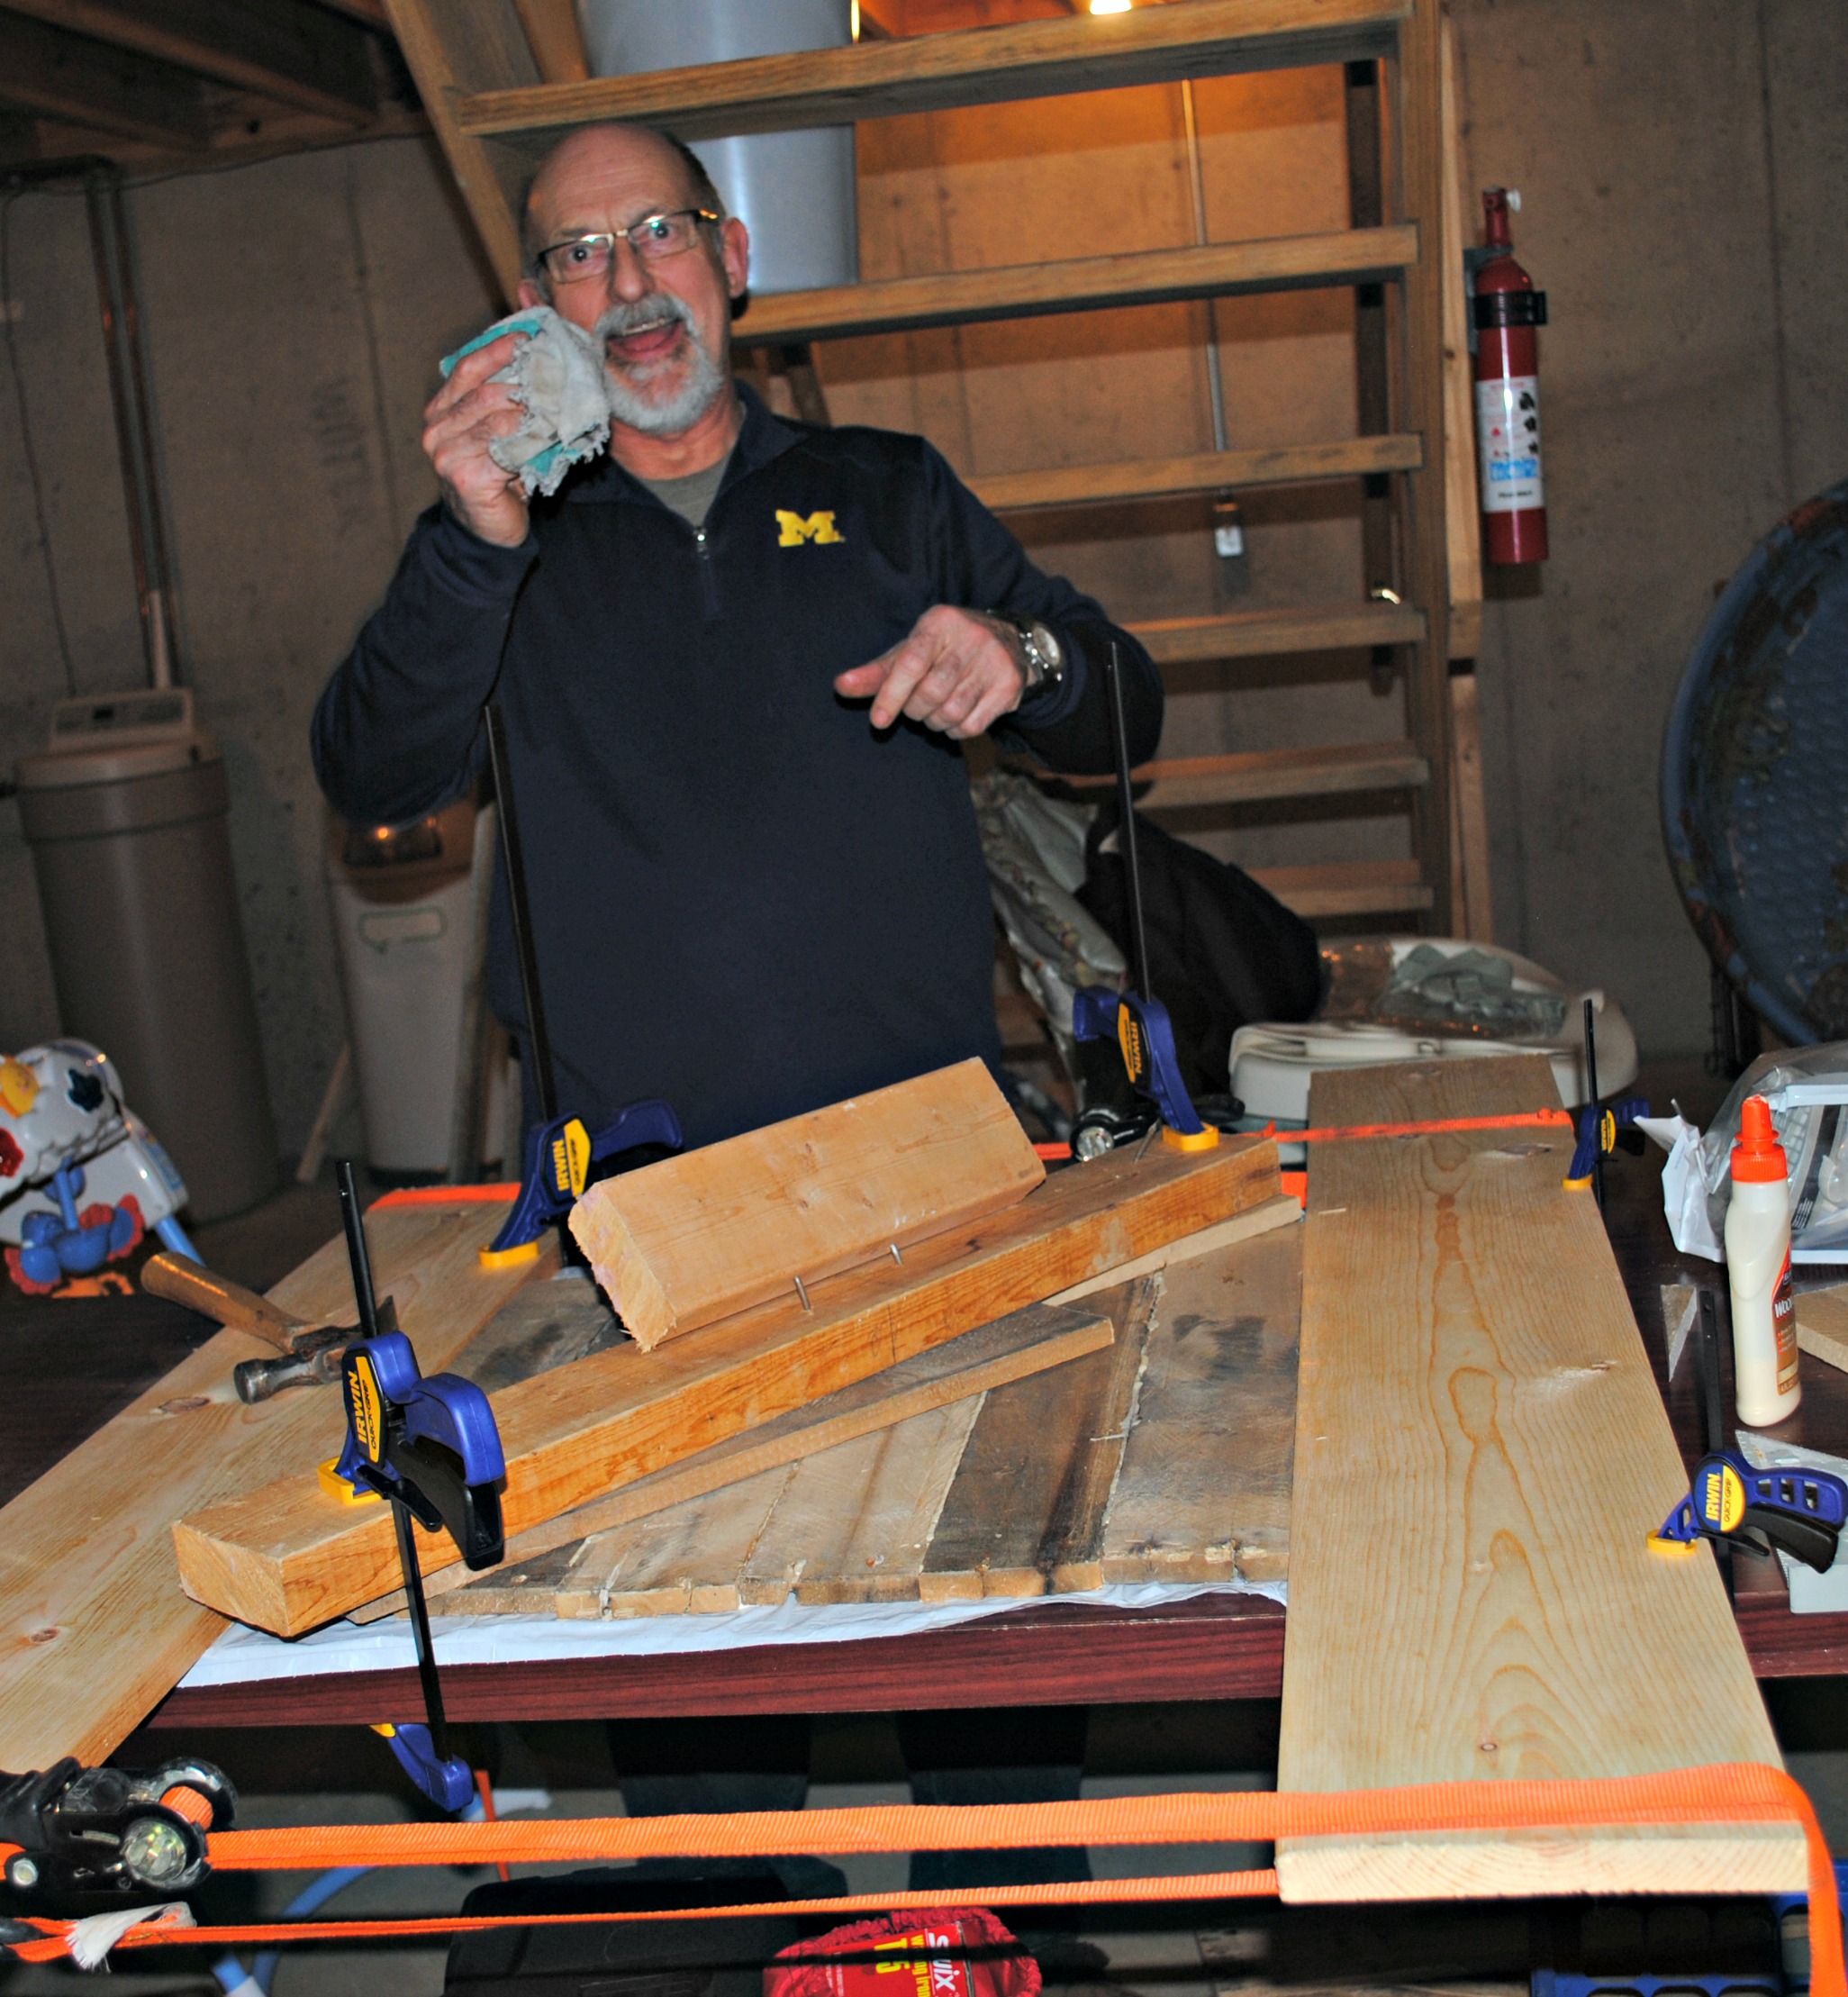
So, our final attempt was to clamp a few pieces over top of the pallet wood so it didn’t have the chance to pop up. I’m not even going to try and explain this set up. My advice to you is to go ahead and get yourself some clamps that are long enough.
This is my dad saying you should always have a wet rag while working with wood glue. You should listen to him, he’s usually right about this stuff. Thanks, dad!
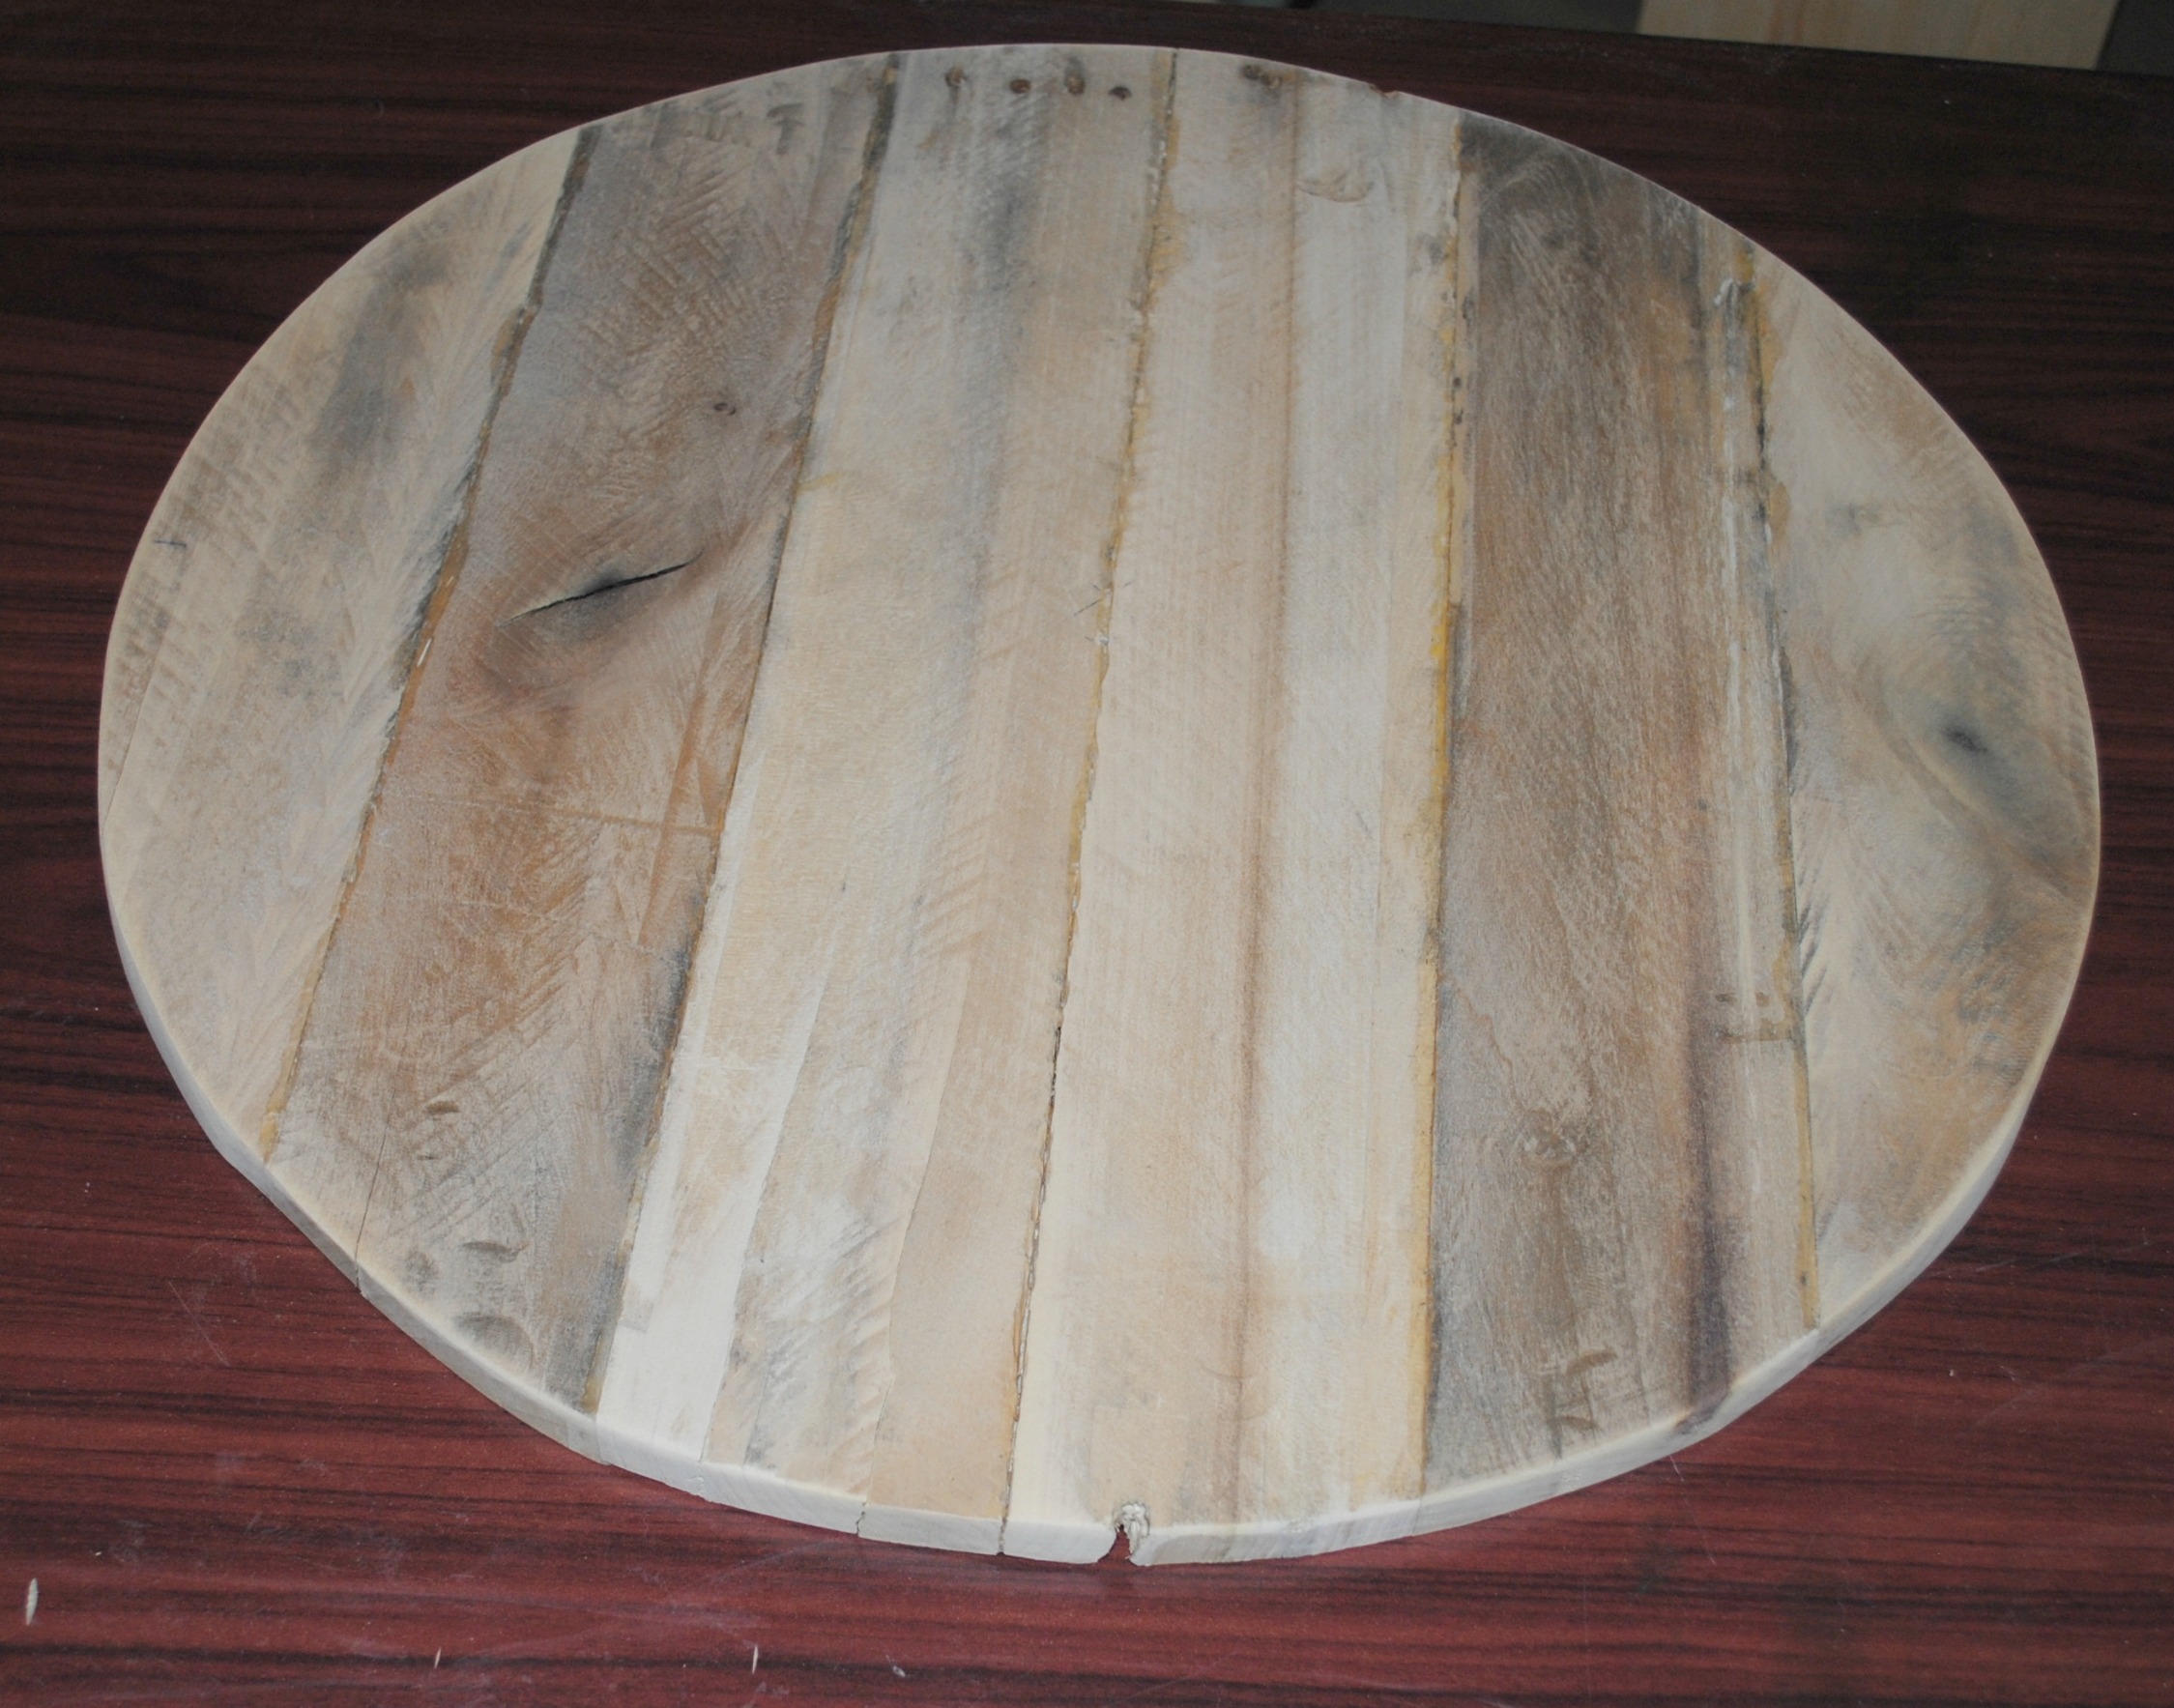
We let that dry overnight, then we got to work on making this bad boy into a circle.
I got a jig saw for Christmas last year (woot!) so I was pretty pumped to use it for the first time.
Our first step in making the circle was to find the center of the wood (all joined together). We then made a sort of compass out of scrap wood. I wish I would have gotten a picture of that to show you guys. Sorry! It was just a piece of pine with two holes drilled 10″ apart from each other (because I wanted a 20″ clock). We screwed one side to the center and used a pen through the second hole to draw a line (in circle form) all the way around the wood. This gave us our guide for cutting with the jigsaw.
Here it is all cut out. It’s a little wonky because it was my first time cutting a circle out. Also, my belly kept getting in the way.

I wanted to make sure I sanded down to the line on all of these parts so I used my palm sander and some 80 grit sandpaper all around the edge and a little on the face to get the weird scuff marks off. Don’t sand too much or you will lose that awesome patina pallet wood is known for!
Here she is looking much less wonky.
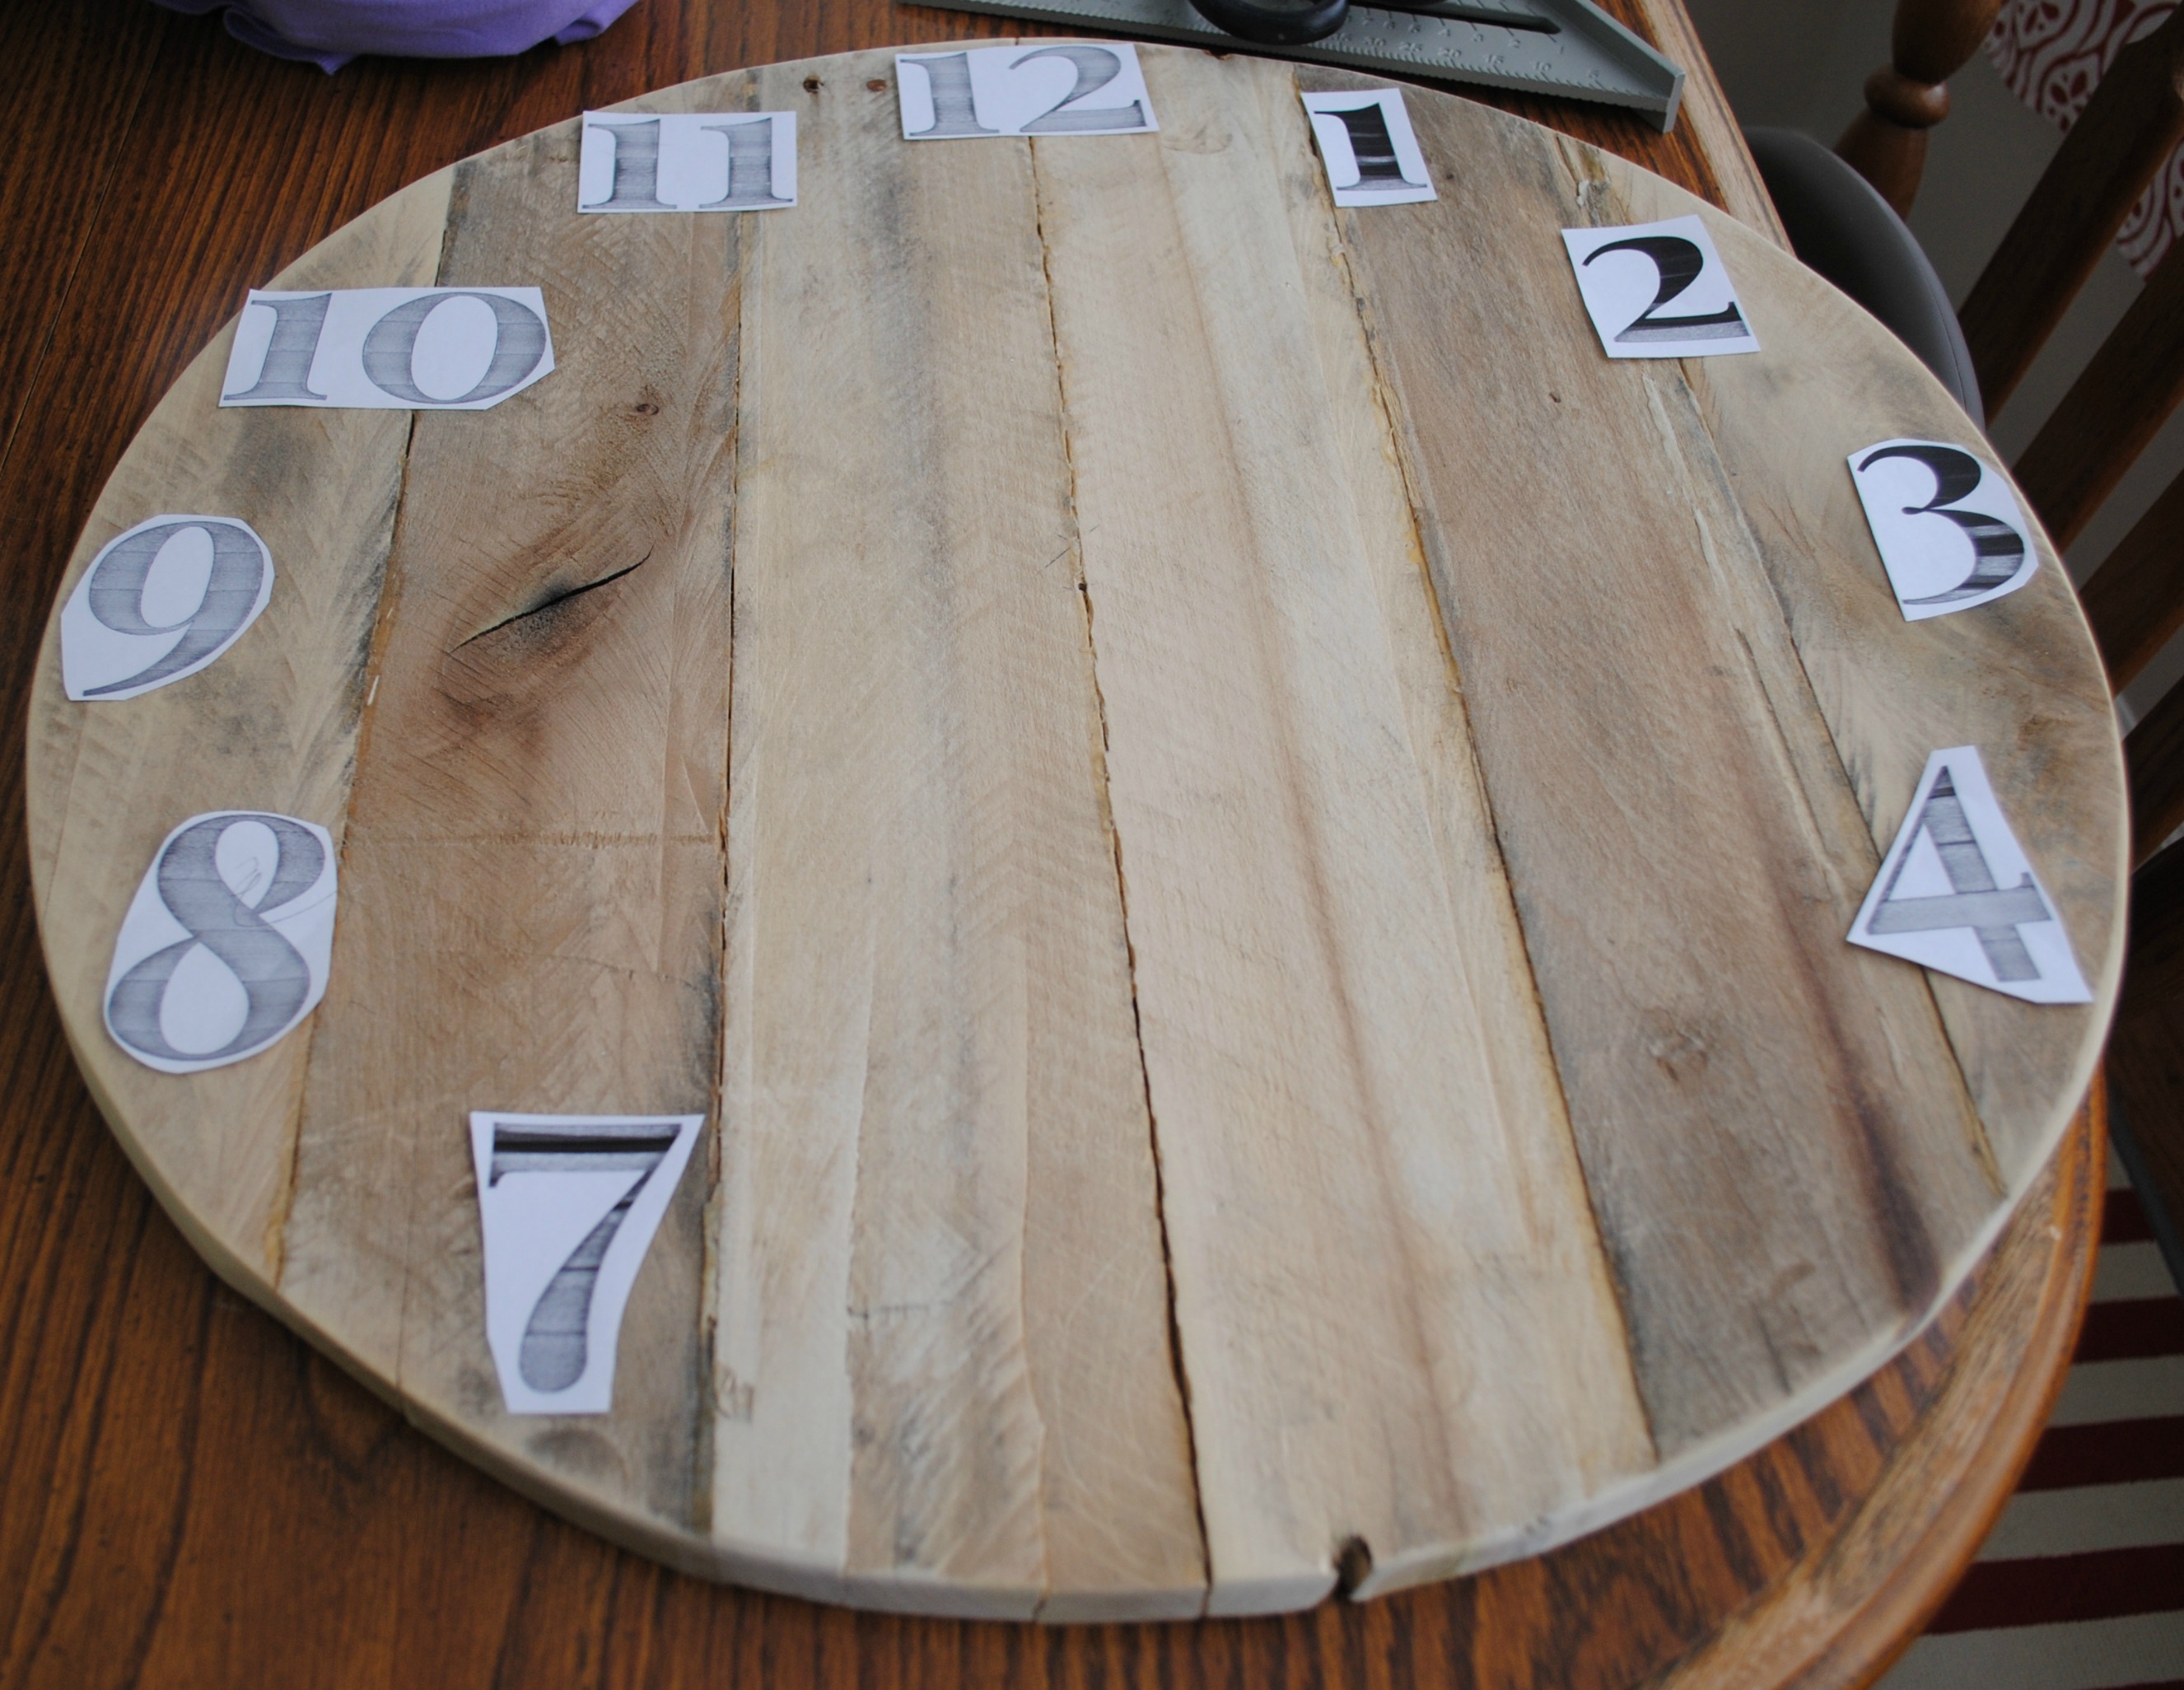
It was time to bring her upstairs and get my craft paint on. The numbers I printed out were from PicMonnkey. I used the font Playfair in size 300. After printing and cutting the numbers out, I placed them all around the clock. In order to find the correct spot for each number (this is important because you want your time to be accurate!), I used a square to find the right angles for each number. The numbers 12, 3, 6, and 9 were pretty easy because they are just centered. For the rest, I basically just put the square in the center (using my center hole, making sure it was sitting at 90 deg) and put the two middle numbers at 30 and 60 deg for each section.
I used my fave ballpoint pen technique to transfer the numbers onto the wood for painting. Then using the wrong side of a craft brush, I outlined each number.
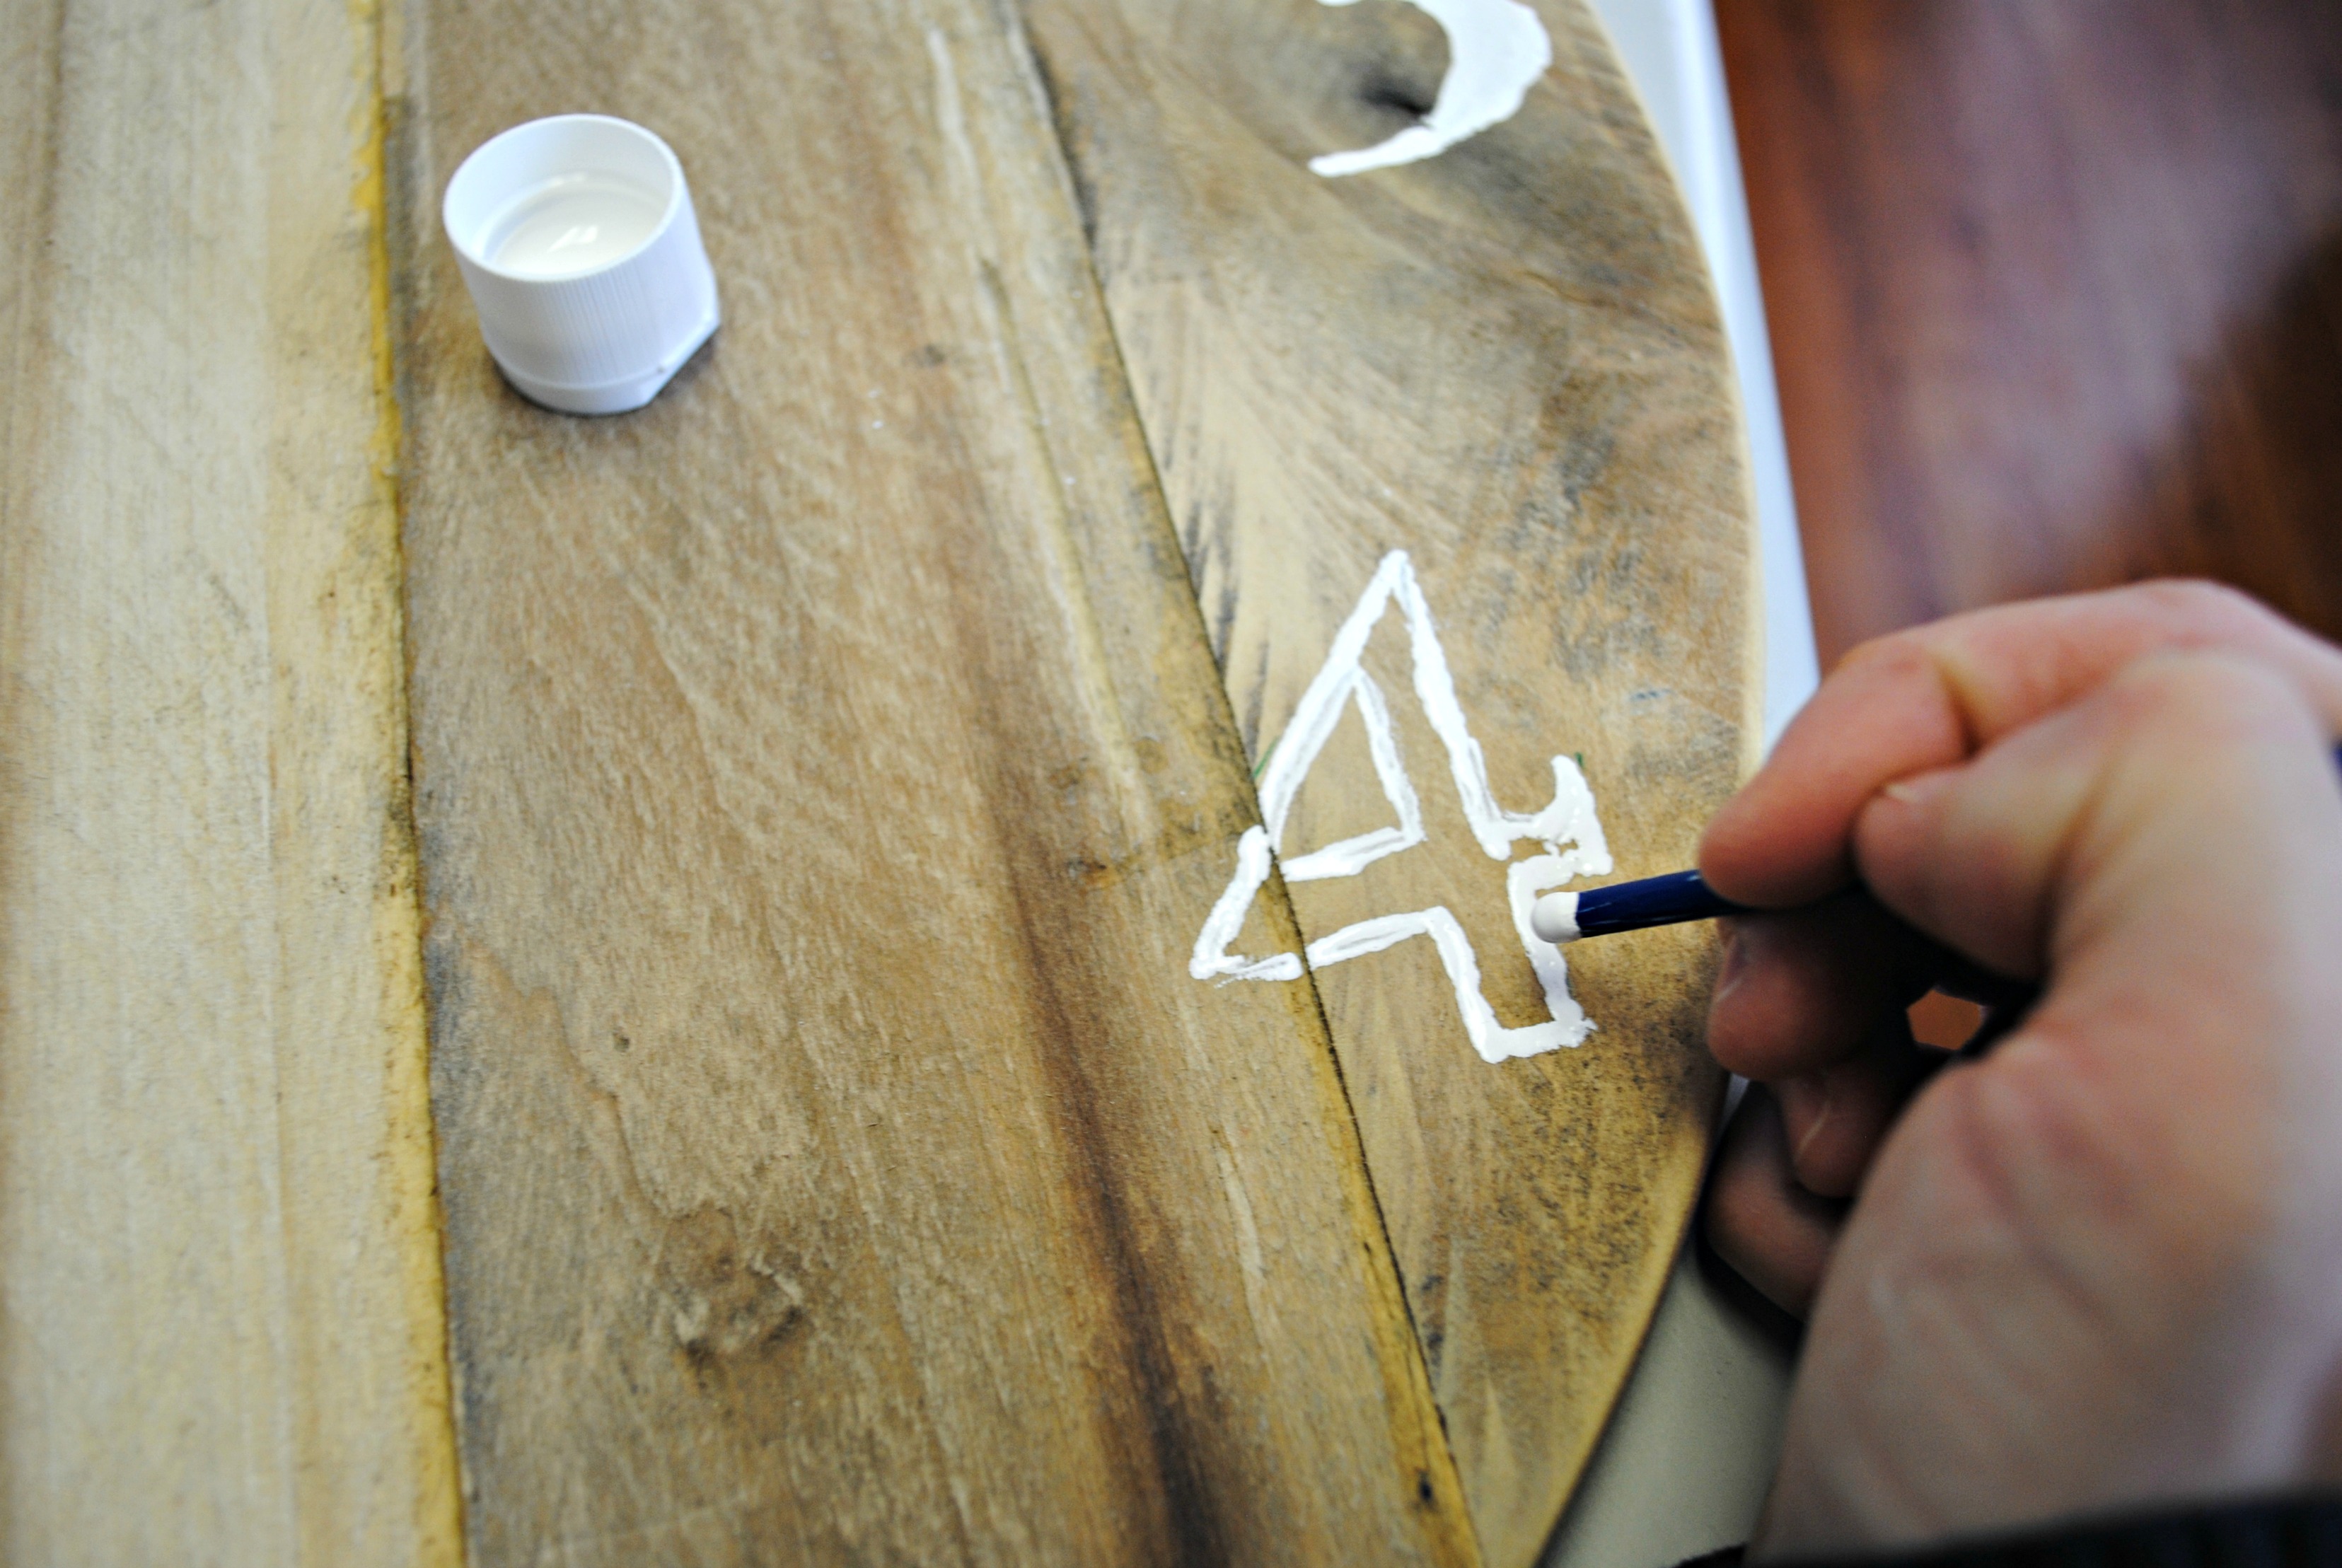
Then, I flipped the brush over and filled in the number.


After finishing all of the numbers, I set it aside and let it dry.

Now it’s time to make this baby an actual clock!
I ordered this clock movement from Etsy and just installed it per the instructions. We had to chisel out quite a bit of the wood on the back for the movement to work with our wood. I bought the largest shaft I could find, but it still wasn’t big enough for the thickness of wood we used. (So many jokes to be made right there. I can’t even. This is a family blog!!) John did most of this part, but I got to help too! And by help, I mean show off my Jamicure =]

On the back we had to put a few scraps of wood across so we could hang the clock and have it sit flat (since the clock movement is bulky in the back). We glued and clamped two 1 x 2s on the top and bottom of the back of the clock.

Then we just attached a saw-tooth hanger to the top and a Command Velcro strip to the bottom (for added stability) and we were ready to hang that baby in the living room!

Whew! I’m so happy with how this project turned out! It goes so awesome in our living room, plus it’s really nice to be able to check the time now.
So, who is going to attempt this next??

